Firstly, go into Stardesign interior. On page 3, you'll find this;
Once you've selected this, make it green and add a {insert colour} circle wherever you wish
Next, take the circular shading (second shape) and make it white. Drag the transparency down to half way and place in on the red circle.
Do the same again with the shading only this time, make it black and place it opposite the white one.
Get a small yellow rectangle and add it to the 'cherry'. Also take a squashed yellow ring and put it on top of the square. Then drag the first bar right down to the bottom so it's behind the ball.
* Optional extra* Taking the first square shading, make it orange and the same size as the yellow square. Put it on top c:
Repeat all these steps in two other places like so. Customize the colours to your liking.

For the tinsel, layer the circular white shading items across the design. You could also make this gold, silver or whatever suits you (:
Make sure you've got your settings like so;
...and click on 'My Fabric'. Zoom right in and position the sheet until you're satisfied.
You will need to purchase 3 of these.
Go into your suite and open up the bag. The first one should be the largest. Make it big but not massive like so;
Then get your second one. Make it slightly smaller and place it on top or behind the first one.
The final one goes on top. It should be pretty small.
*Press save!*
The last step is very simple. Go back into the interior designer and create a simple green sheet. Do not put anything on it, just make sure it's the same shade of green as the one you used for your previous designs. Buy it and in your suite, turn it on its side like this so that the longest side is somewhat adjacent to the ones you've already made.
Put it to the back
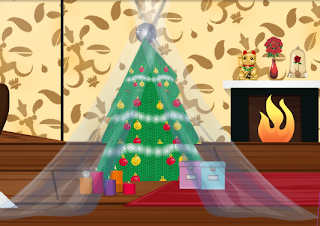
Now you can decorate around your tree however you want.
I decided to drape sheets and put presents under mine. Nearer the time, Stardoll usually bring out decorations such as lights and presents which will be great for it.
Enjoy your Christmas tree! I'm not SS and have no stardollars so I thought this was a great alternative to buying money.
-Georgia {geofizzz}


I tried it, And my tree looks awsome xD Mine costed 42sc, but I am loving it! Thank you Georgia!
ReplyDeleteKhelraja offers a user-friendly betting experience with multiple game categories. The Free spins feature gives players extra chances to enjoy slot-style games without extending budgets. The website is secure, easy to navigate, and suitable for mobile users. It works well for players who prefer relaxed and engaging online gameplay.
ReplyDelete